How to Access the Web Interface of the DNS-320 Remotely using D-Link Router
How to Access the Web Interface of the DNS-320 Remotely using D-Link Router
You will need to forward the HTTP port on your router in order for you to access the web interfaces of
the DNS-320 remotely. Please check with your router vendor on how to enable port forwarding on you
router.
Below is an example on how to perform port forwarding on D-Link Router.
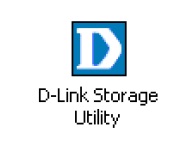
Step 1: Double click on the D-Link Storage Utility.
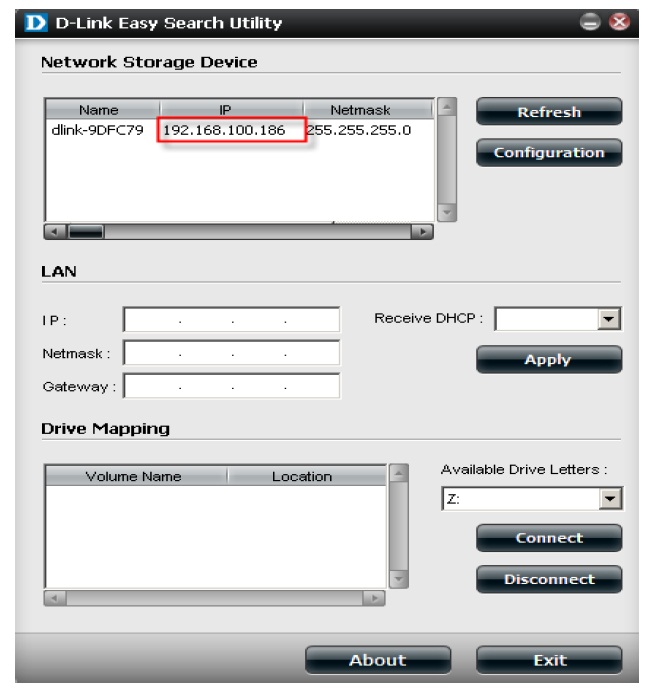
Step 2: On the D-Link Storage Utility Software, take not of the IP address of your DNS-320 as we
need it on the router port forwarding.
Step 3: Open a web browser such as Internet Explorer, Mozilla Firefox, Safari and etc. On the Address
bar type in the LAN IP Address of the D-Link router which is 192.168.0.1 and then press on the Enter
key on your keyboard.

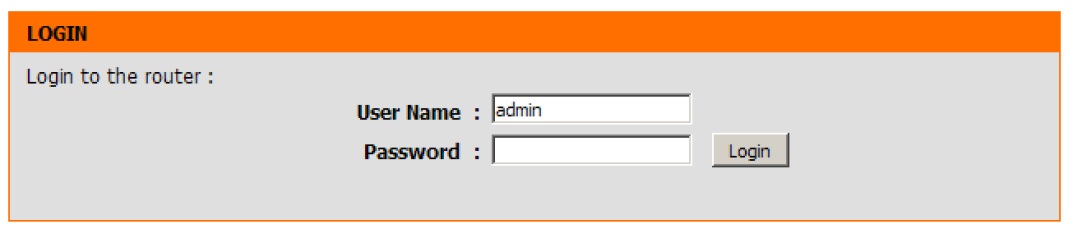
Step 4: A login screen will appear, type in the User Name as “admin” and the Password as
“password” all in lower case and then click on the Login button.
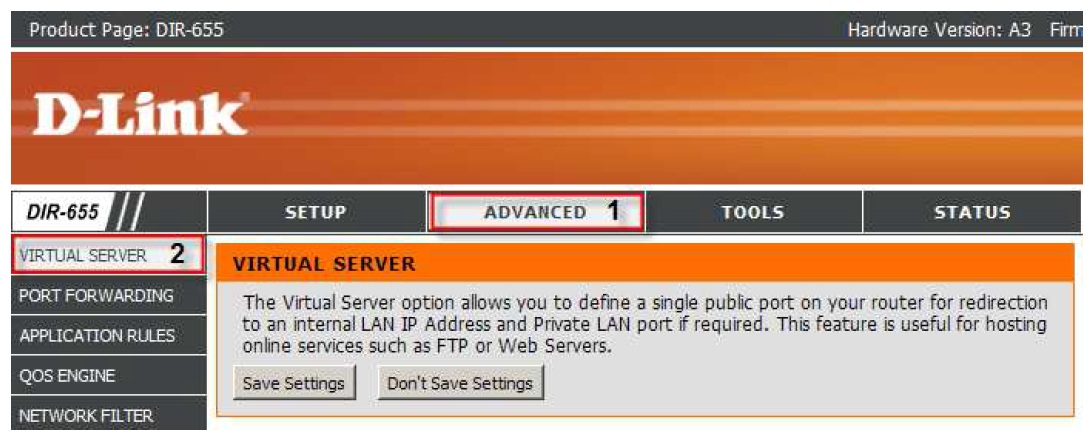
Step 5: Click on the ADVANCED tab and then select on VIRTUAL SERVER button on the left hand
side.
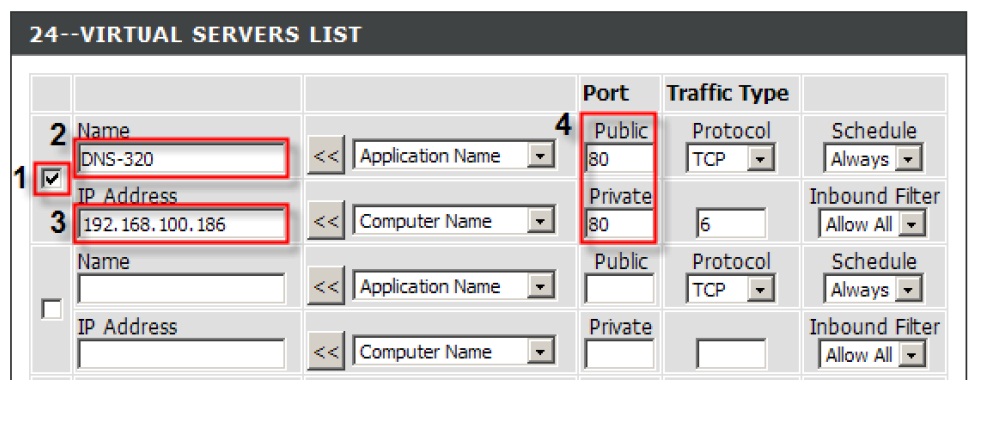
Step 6: Under the VIRTUAL SERVER LIST section, configure the following;
1. Put a check mark on the row to enable the rule
2. Enter a name for the policy you would like to create
3. Enter the IP Address of the DNS-320 (On Step 2)
4. Enter Port 80 both on Public and Private port.
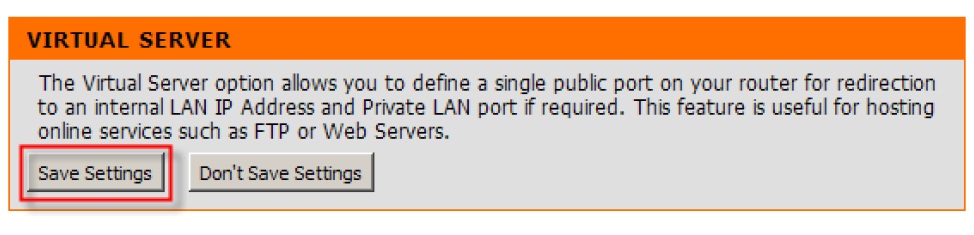
Step 7: Click on the Save Settings button for the settings to take effect.
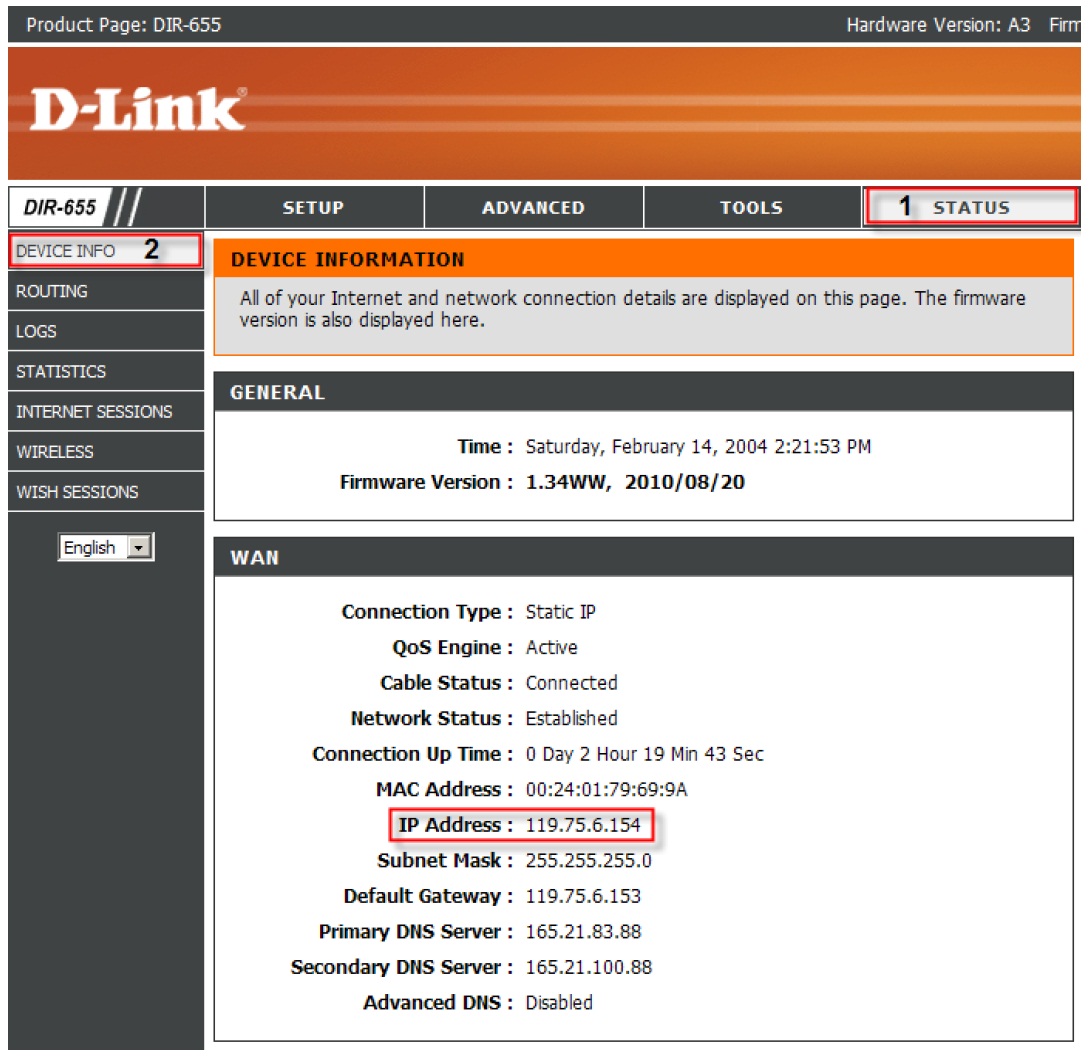
Step 8: Click on the STATUS TAB and then select on DEVICE INFO button on the left hand side.
Take note of the IP address under the WAN section.
Step 9: Open a web browser such as Internet Explorer, Mozilla Firefox, Safari and etc. On the Address
bar type in the WAN IP Address of your router (On Step 8) and then press on the Enter key on your
keyboard.

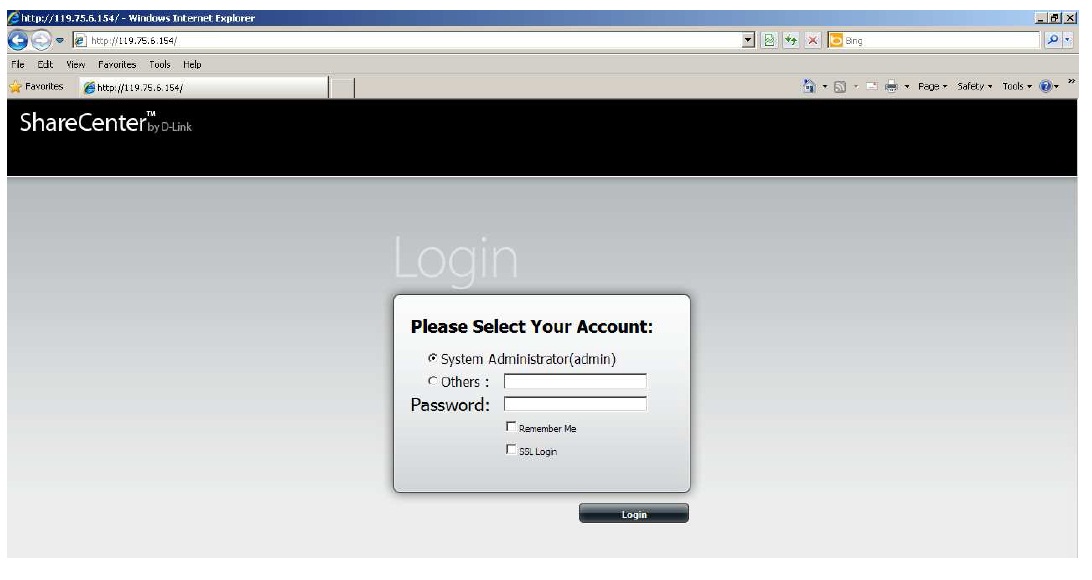
Step 10: The ShareCenter login screen will now show up.